Add Row
Add Element
chambers first class connections kc
update

Home Improvement Contractors -
Greater Kansas City -

update
Add Element
  • Home
  • Restaurants For Contractors
  • Business Directory
  • Local Reviews
  • Kitchen Remodel
  • Outdoor Gardens
  • Grilling Outdoors
  • Handy Man
  • Outdoor Kitchens
  • Pools and Outdoors
  • Deck Remodeling
  • Basement Remodeling
  • Work Wear
  • Homeowner Tips
  • Water & Ai Purification
  • Relocate 2 Kansas City
  • Celebrity Stories
  • Auto Storys
  • Business Directory
  • Olathe Home Services
  • Home Tips
  • Home Remodel
  • Lawn and Landscape
  • Tree Care
July 23.2025
3 Minutes Read

Creative Solutions for Window AC Side Panels That Don't Fit

Window AC installed with misaligned side panels, troubleshooting tips.

Don’t Let AC Side Panels Get in Your Way

As summer heats up, many of us are pulling out our window air conditioners to escape the sweltering heat. However, if you’ve recently moved or upgraded your AC unit, you might find a frustrating problem: your air conditioner's side panels don’t fit into your window. This dilemma can dampen the summer fun, but with a little creativity and some guidance, you can still achieve a cool and comfortable home.

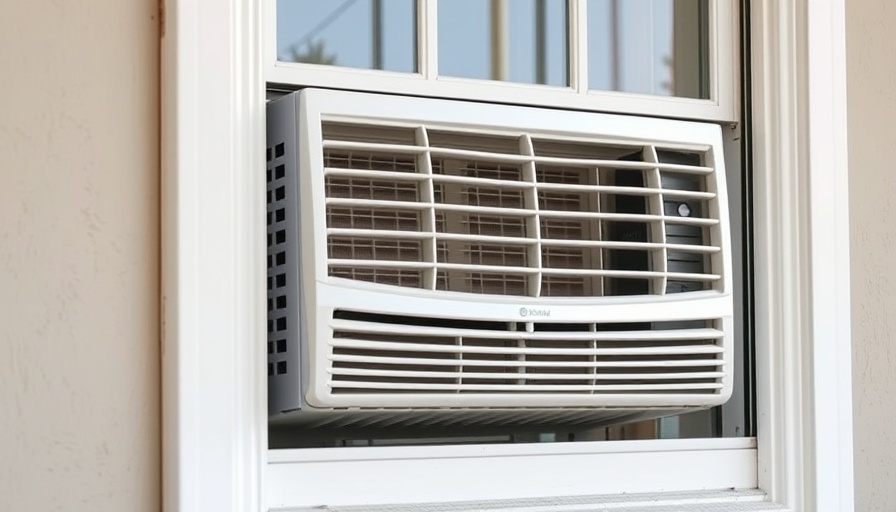
Understanding AC Side Panels

First, let’s clarify what AC side panels are. These are the extendable plastic segments that sit on either side of your air conditioning unit to bridge the gap between the unit itself and your window frame. They play a crucial role in sealing your home against bugs, rain, and dust while ensuring that the cold air produced by your AC stays indoors. Ideally, these panels are designed to fit specific models, but mismatched situations can arise.

What to Do When Side Panels Don’t Fit

When your AC unit’s side panels don’t properly suit your window, you have several workable options:

  • Use Only One Panel: If you find your window’s width is insufficient for both panels, consider removing one. Positioning the unit closer to one side allows you to extend the remaining panel to cover the gap.
  • Create Custom Panels: In cases where your existing panels are too short, get creative! Materials like plywood, rigid foam board, or even plexiglass can be used to cut custom-sized panels. Just measure and fit them where needed, ensuring no outdoor air escapes.
  • Upgrade Your AC: If your opening is significantly larger than the AC unit, it might be time to invest in a larger model that fits properly, minimizing any necessary extra sealing.
  • Seal Gaps with Weatherstripping: For minor adjustments where panels almost fit, use weatherstripping or similar materials to fill in small openings and reduce airflow.

Smart Strategies for Optimizing AC Performance

Beyond just fitting your unit, consider how to prevent air loss and improve efficiency. Use adhesive-backed foam insulation or sealing tape to minimize gaps. Products like the Flex Seal Flood Protection Tape can provide temporary fixes without leaving residue.

Alternatives to Traditional Side Panel Solutions

While side panels are standard, exploring alternatives can be beneficial. For instance, using foam boards in conjunction with tape can provide insulation and effectively seal gaps. This strategy not only saves you money but also enhances energy efficiency.

Community Insights and Shared Experiences

Homeowners everywhere face similar challenges when it comes to cooling their homes effectively. Many share experiences online in forums and communities dedicated to home improvement. Utilizing these resources can provide you with tried-and-true solutions from those who have tackled the same issues. Analyze your space, budget, and climate conditions to find what works best for you.

In conclusion, while fittingAC side panels can be challenging, it shouldn't prevent you from enjoying a cool home this summer. Evaluate your options, utilize creative solutions like custom panels or seals, and consider what adjustments you can make to ensure comfort without hassle. Getting it right can protect your home from the elements and keep your cooling costs manageable.

Home Tips

Write A Comment

*
*
Related Posts All Posts

Is Investing in a Car Night View Camera Worth Your Money?

Update Understanding Car Night View Cameras As technology continues to evolve in the automotive industry, features once exclusive to luxury cars are becoming more common. Among these innovations are car night view cameras, designed to enhance visibility during night driving. But are these devices truly necessary, or simply a luxury add-on that may distract drivers? The mechanics behind these cameras involve infrared technology, which can potentially spot pedestrians as far away as 80 meters. However, as with any technology, effectiveness varies based on driving environment and conditions. Are They Worth the Investment? A crucial question to ask is whether investing in a night vision camera equates to increased safety. According to Kelley Blue Book, while the technology shows promise in preventing accidents, its real-world effectiveness can differ significantly depending on various factors including driver experience and regional climate. For instance, a driver in an area prone to fog may find these cameras less valuable compared to someone who drives in clear conditions. This highlights the importance of personal circumstances and budget when considering such an upgrade. Limitations of Night Vision Cameras Despite their benefits, night vision systems come with limitations. While they detect living objects effectively, they may struggle with inanimate obstacles like barriers or debris. In warmer climates, thermal readings can also be affected, complicating reliability on hot nights. This suggests that drivers should not solely depend on this feature; understanding its capabilities and constraints is vital for safe driving. Coupled with existing features like backup cameras, night vision could be beneficial, but it should never replace driver vigilance. Options for Every Vehicle Owner If you're intrigued by the benefits of night vision technology but can't justify the premium on luxury vehicles, there are after-market options available. Various manufacturers sell night vision dash cameras that can be installed easily in most cars, providing similar advantages without the need for a high-end purchase. The Future of Night Vision Technology As innovation continues, it's likely that car night vision technology will evolve. Future advancements could enhance the effectiveness of these systems, making them more reliable in various weather conditions. Additionally, as safety regulations become stricter, car manufacturers may more widely incorporate this technology, shifting how drivers approach night driving. Ultimately, assessing whether a night vision camera is worthwhile depends on its features, your driving habits, and the driving conditions typical to your area. Stay informed about new developments in this technology, as it may soon redefine the standards for vehicle safety.

Essential Tips for Repairing Vinyl Plank Flooring: A DIY Guide

Update Understanding Vinyl Flooring Repair TechniquesVinyl plank flooring is a favorite among homeowners for its durability and aesthetic appeal. However, even the best can suffer from damage due to wear and tear, spills, or accidents. Knowing how to effectively repair your vinyl flooring not only prolongs its life but also enhances the overall beauty of your home. Therefore, understanding the two primary methods for replacing damaged planks is crucial for effective home maintenance.Method 1: Uninstalling and Replacing the Damaged BoardFor high-quality, name-brand vinyl plank flooring, the best repair method is to unclick and replace the damaged plank. This method preserves the integrity of your flooring system. Local flooring expert Gary Bernard underscores its efficiency, particularly in smaller spaces, allowing homeowners to tackle repairs swiftly. "If it’s in the middle of a 12×12-ft. room, it’ll take about 25 minutes to unclick the floor, replace the damaged board, and reinstall it," he explains.Method 2: Glue-in ReplacementFor lower-quality vinyl flooring, homeowners might have to resort to cutting out the damaged piece and gluing in a replacement. While this is a feasible option, flooring professionals suggest caution. As noted by Alex Ciocek from Summerlin Floors, this approach alters the nature of your flooring from a floating system to a glue-down installation, which can lead to future problems with surrounding planks. "It's not an ideal fix, but if you choose this route, we’ll provide the necessary steps," Ciocek affirms.Essential Tools and MaterialsEmbarking on a DIY vinyl plank repair requires a few specific tools. A chisel, circular saw, hammer, utility knife, and pry bar are among the essential items you will need for an effective repair job. Additionally, having replacement planks and superglue on hand will streamline your process.Step-by-Step Repair GuideHere’s a succinct guide to help you navigate the repair:Remove the Baseboard: Use a utility knife to score the edge of the baseboard and then remove it with a hammer and pry bar.Pry Up the Floor: Get a pry bar under the installed piece and pop it up carefully.Replace the Damaged Board: Slide in the new piece and reinstall any baseboards.This method allows homeowners to easily refresh their flooring without incurring hefty contractor fees, ultimately saving both time and money while ensuring a home’s aesthetic appeal remains intact.Emotional Benefits of a Successful RepairSuccessfully repairing your vinyl flooring not only enhances the physical space but also instills a sense of accomplishment and pride. Homeowners find that they enjoy their living spaces more when they take an active role in the upkeep of their homes.ConclusionWhether opting for the unclick method or the glue replacement option, homeowners now have the tools and knowledge to tackle vinyl plank flooring repairs confidently. Stay engaged with your home maintenance—and remember, the right repairs today lead to a beautiful living space tomorrow. Explore our newsletter for more insights.

Master Heat Pump Thermostat Wiring to Enhance Home Efficiency

Update Transforming Your Home: The Benefits of DIY Heat Pump Thermostat WiringFor many homeowners, upgrading a home’s heating and cooling system can seem daunting and expensive. Yet, wiring a heat pump thermostat can prove to be a simple and cost-effective way to improve the overall functionality and efficiency of your home's HVAC system. This task not only empowers you with a sense of accomplishment but also allows for better control over indoor temperatures.Why Replace Your Heat Pump Thermostat?Replacing your thermostat can enhance the performance of your system, potentially leading to energy savings thanks to improved efficiency. Poorly functioning thermostats can cause fluctuations in temperature, increased energy bills, and discomfort.Understanding the Wiring ProcessThe process of wiring your heat pump thermostat, as described by HVAC expert Micah Sherman, begins with turning off the power to prevent accidents. This involves locating the disconnect switch or circuit breaker that controls your unit. It's essential to have a non-contact voltage tester handy to avoid any surprises during the installation process.Tools and Materials NeededBefore diving into the wiring, gather the necessary tools: a marker for labeling wires, a Phillips screwdriver, a small flathead screwdriver, and wire strippers. Additionally, ensure you have your new thermostat and light-colored electrical or masking tape available. This preparation streamlines the entire DIY process, making it manageable and straightforward.Step-by-Step Guide to Wiring Your ThermostatThe steps to wire your new thermostat include:Turn Off the Power: Always ensure the system's power is shut down before beginning the project.Remove the Old Thermostat: Take care to label and photograph the wires to ensure a smoother transition to the new unit.Attach the New Thermostat: Carefully follow the wiring diagram for the new device to ensure proper installation and functionality.Each of these steps is easy to follow, unobscured by technical jargon, making the project accessible to homeowners.Practical Insights for HomeownersHomeowners should understand that tackling thermostat wiring is not only about saving money but also gaining knowledge about your home's HVAC system. By engaging in this process, you equip yourself with essential skills that can pay dividends down the road, such as recognizing when to seek professional help versus managing DIY tasks.Common Misconceptions on Thermostat WiringOne prevalent misconception is that only professionals can effectively handle wiring tasks. While hiring an HVAC technician is advisable for complex setups, basic thermostat wiring can be a straightforward DIY project for most homeowners. The key is preparation, understanding the components involved, and taking safety precautions.The Future of Homeowner EmpowermentAs technology continues to evolve, so does the accessibility of home repairs. With resources like instructional videos and online guides, homeowners are empowered more than ever to take control of their living spaces. This shift not only encourages self-sufficiency but also helps to foster larger communities of knowledgeable home improvers.Ready to take control of your heat pump thermostat wiring project? Start today by gathering your tools and following the steps outlined above. Embrace the chance to improve your home's efficiency while engaging in a rewarding DIY experience!

Terms of Service

Privacy Policy

Core Modal Title

Sorry, no results found

You Might Find These Articles Interesting

T
Please Check Your Email
We Will Be Following Up Shortly
*
*
*