Add Row
Add Element
chambers first class connections kc
update

Home Improvement Contractors -
Greater Kansas City -

update
Add Element
  • Home
  • Restaurants For Contractors
  • Business Directory
  • Local Reviews
  • Kitchen Remodel
  • Outdoor Gardens
  • Grilling Outdoors
  • Handy Man
  • Outdoor Kitchens
  • Pools and Outdoors
  • Deck Remodeling
  • Basement Remodeling
  • Work Wear
  • Homeowner Tips
  • Water & Ai Purification
  • Relocate 2 Kansas City
  • Celebrity Stories
  • Auto Storys
  • Business Directory
  • Olathe Home Services
  • Home Tips
  • Home Remodel
  • Lawn and Landscape
  • Tree Care
May 03.2025
3 Minutes Read

Say Goodbye to Holes: How to Fix Drywall Like a Pro

Close-up, fixing a hole in drywall with a putty knife.

Mastering Drywall Repair: A Necessity for Every Homeowner

For homeowners aged 35-60, understanding how to maintain one's home is an empowering skill. One common household issue that often arises is the appearance of small holes and cracks in drywall. Whether caused by wear and tear or the occasional mishap, fixing these imperfections can save you costly repair bills and restore the aesthetics of your living space. Fortunately, repairing drywall is simpler than you might think, and can be accomplished in just six straightforward steps.

What You’ll Need: Simple Tools for Your Drywall Repair

Before diving into the steps of fixing your drywall, it's essential to have the right tools at hand. For a successful repair, gather the following items:

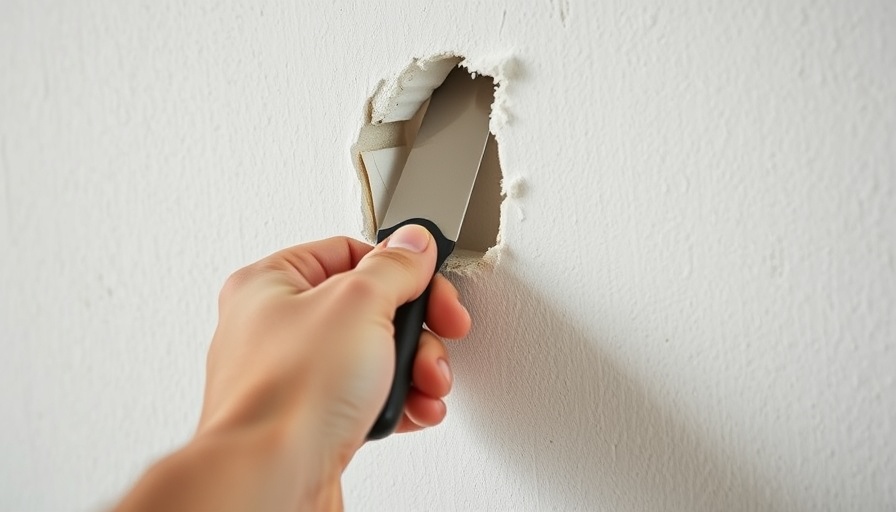
  • Putty Knife: Ideal for applying spackle smoothly.
  • Fine-grit Sanding Sponge: For smoothing out the surface before and after applying spackle.
  • Clean Rags: To wipe down the area and remove dust.
  • Paint: To touch up once your repair is complete.
  • Work Light: This can help you identify more holes and imperfections.

Step-by-Step Guide to Fixing Small Drywall Holes

Let’s break down the repair process into clear steps:

Step 1: Illuminate Your Workspace

Before you start, position your work light to shine on the drywall. This will help you see all the defects you might not notice otherwise. Proper lighting reveals hidden holes and ensures a comprehensive repair job.

Step 2: Sand Down Loose Edges

Use a fine-grit sanding sponge to level the area around the hole. If there are any rough edges, sanding them down will create a smooth surface for the spackle to adhere. This step is vital for achieving professional-looking results.

Step 3: Cleanup is Key

Once you've sanded, it's crucial to remove dust from the surface. Utilize a damp rag to wipe down the area, ensuring that it’s clean and dry before moving on to the next step.

Step 4: Apply Your Spackle

With a clean putty knife, apply the spackle over the hole. Spread it evenly, pressing down to ensure it fills the indentation completely. This step may take some patience, but it's essential for a seamless finish.

Step 5: Wait for Drying

Depending on the type of spackle, the drying time can vary from one to five hours. It's vital to allow it to dry completely before proceeding to the next step. Rushing this could lead to poor results.

Step 6: Sand and Paint

Once the spackle is dry, grab your sanding sponge again. Smooth the area to blend it nicely with the surrounding drywall. Finally, touch up the paint to match the rest of your wall.

Why Knowing How to Fix Drywall Is Important

By learning to repair drywall, homeowners not only save money but also gain a sense of accomplishment. Tackling small home repair projects builds confidence and fortifies your capability to handle household responsibilities. Improved aesthetics from well-maintained walls can also enhance the overall value of your property.

The Benefits of DIY Repairs

Whether you're preparing to sell your home or simply enjoy the satisfaction of home maintenance, knowing how to fix drywall is invaluable. It'll empower you to create a pleasant living environment for yourself and your family, turning a tedious chore into a rewarding experience.

So, why not pick up the tools and tackle that drywall repair today? Your walls will thank you!

Home Remodel

Write A Comment

*
*
Related Posts All Posts

Essential Insights Revealed: Discover the Best Oscillating Fans for Your Home

Update Discovering the Best Oscillating Fans for Your Home With summer temperatures rising, many homeowners are searching for effective cooling solutions. We put ten oscillating fans through rigorous testing over two months to determine the best models for keeping your space comfortable. By evaluating performance, noise levels, and energy efficiency, we provide you with the insights needed to make an informed purchase. Why Choose an Oscillating Fan? Oscillating fans are popular for their ability to distribute air across a wider area compared to stationary fans. This creates a more comfortable environment within your home, making them ideal for bedrooms, living rooms, or home offices. Homeowners can often notice a reduction in energy costs when using oscillating fans in conjunction with air conditioning. This is because fans help to circulate cool air more effectively, allowing for comfortable living without continuously running the AC at a high setting. The Science Behind Our Testing During our testing, we focused on seven essential benchmarks: air circulation, oscillation range, noise level, oscillation speed, design and portability, energy efficiency, and ease of assembly. Each fan was subjected to a series of standardized tests to measure how well they performed under typical home conditions. Top Picks for Best Oscillating Fans After conducting our comprehensive analysis, we found several standout fans that excelled in their performance: Fan A: Exceptional airflow and silence, ideal for night use. Fan B: Stylish design with energy-saving functions. Fan C: Robust construction and versatile settings, suitable for both indoors and outdoors. Impact of Quality Fans on Comfort An oscillating fan can significantly improve your quality of life during hot months. Besides cooling your home, these fans can increase ventilation, reduce humidity levels, and enhance your overall home environment. Homeowners reported feeling more relaxed and able to enjoy their living spaces with a reliable oscillating fan. Energy Efficiency Matters With rising energy costs, selecting an energy-efficient fan is crucial. Many modern fans come with power-saving technologies that reduce electricity usage without sacrificing performance. This can lead to lower monthly bills, making them an economical addition to your home appliances. During our testing, we noted which fans used less power while still delivering optimum cooling capabilities. Final Thoughts on Choosing the Right Oscillating Fan When choosing an oscillating fan, consider factors such as size, noise level, energy consumption, and brand reliability. A well-chosen oscillating fan not only enhances comfort at home during hotter months, but it also can add style and efficiency to your interior space. Before making your decision, consider harnessing the benefits of our thorough testing results. Don't let the summer heat disrupt your comfort. Invest in a quality oscillating fan based on our findings to keep cool and relaxed all season long.

Why Are Street Lights Turning Purple? The Truth Behind the Trend

Update Understanding the Purple Street Light Phenomenon Have you ever driven through your neighborhood and stopped yourself mid-journey, wondering why some street lights shine a peculiar purple hue? While these lights can make for a whimsical spectacle after dark, many are confused by their presence. The reality is less magical and more a matter of mishaps in manufacturing. Recent insights shed light on how these purple street lights came to be and what they mean for our communities. What’s Behind the Color Change? According to experts, purple street lights occur primarily due to a manufacturing defect that affects the phosphor coating on certain LED lights. Originally designed to emit a balanced white light, these LEDs sometimes develop a purple tint as the coating degrades. Michele Lapicco, a design consultant, explains that this issue has become noticeable as cities nationwide have upgraded their lighting systems to more energy-efficient LEDs in recent years. As mentioned in reports, the problem appears tied to specific batches of streetlights manufactured between mid-2017 and 2018. Particularly, Acuity Brands Lighting, a major player in the lighting sector, faced scrutiny as the purple hue gained popularity, leading many cities to initiate replacements of the faulty lights. Impact on Visibility and Safety This shift in color may seem like an aesthetic choice, but it poses real concerns for driver visibility and public safety. Alisha Kessler, a lighting product manager, notes that the purple light lacks the full-spectrum coverage needed to ensure clear visibility at night. This deficiency might distort color perception and depth, making it difficult for both drivers and pedestrians to judge distances or notice hazards—especially in poorly lit areas lacking reflective signage. What Should Homeowners Know? As homeowners, it’s crucial to be informed about the implications of these purple lights in your communities. While they might catch your eye with their unusual colors, communities should prioritize clarity and safety over novelty. Officials across affected cities are already taking steps to replace defective lights, but awareness of the issue is essential for residents who may notice darkened streets or safety concerns arising from inadequate lighting. A Call to Switch to Quality Lighting Ultimately, the purple glow highlights the importance of investing in quality street lighting. As communities strive for safer neighborhoods, the choice of lighting technology plays a pivotal role. High-quality LEDs that maintain their color and brightness not only improve aesthetics but also ensure public safety for everyone on the road. As these changes occur and updates are implemented, remain engaged in community discussions about public safety and lighting systems. Your voice matters in advocating for safer streets. Stay Informed for Safer Streets Have more questions about local lighting initiatives or safety measures in your community? Reach out to local councils or community boards to understand improvement efforts and advocate for suitable lighting policies that keep everyone safe. Knowledge is power, and being an informed resident helps create a caring and proactive neighborhood.

Discover Which Fly Traps Truly Work: Essential Insights for Homeowners

Update Effective Solutions for Homeowners: Fly Traps That DeliverAs homeowners, the comfort and cleanliness of our living spaces are paramount, especially when it comes to outdoor and indoor pests. Given the myriad of options available for fly traps, it can be overwhelming to discern which products are genuinely effective. In our latest experiment, we tested six top-rated fly traps to determine which ones really work.Understanding the Types of Fly TrapsWhen considering fly traps, it's essential to understand the different types available. Some traps use bait to attract and capture flies, while others rely on sticky surfaces. Additionally, electric traps offer a more modern approach, attracting flies with light and zapping them upon contact. Our trial encompassed a variety of these types to see which performed best in real-life scenarios.Insights From Our TestingThroughout our evaluation, user experience was a significant factor. Many traps offered quick setup and easy disposal, which are crucial for busy homeowners. Specifically, the sticky traps proved particularly effective in both indoor and outdoor settings, showing high capture rates compared to other models. Moreover, the traps designed with natural baits minimized odors—a significant advantage for indoor use.Why These Findings Matter for HomeownersThe results of our tests can help homeowners make informed choices. Choosing an effective fly trap not only contributes to a pleasant living environment but also ensures that pest control measures are taken seriously. Understanding which products deliver on their promises means less frustration and a chance for a cleaner home.Practical Tips for Maximizing Trap EfficacyTo get the most out of your fly traps, we suggest several best practices:Place traps near fly entry points, such as doors and windows.Utilize multiple traps for larger areas to increase capture rates.Regularly check and replace traps to maintain efficiency.By implementing these strategies, homeowners can significantly enhance the effectiveness of their fly control efforts.Final Thoughts: Take Action with Proven SolutionsFor homeowners tired of pesky flies ruining outdoor gatherings or indoor tranquility, investing in effective fly traps is crucial. Our tests revealed significant insights that can guide your purchasing decisions, ensuring a fly-free home. If you’re encountering persistent fly issues, consider these traps and take control of your home environment today.

Terms of Service

Privacy Policy

Core Modal Title

Sorry, no results found

You Might Find These Articles Interesting

T
Please Check Your Email
We Will Be Following Up Shortly
*
*
*